
10 Steps for Smarter Intubation
While endotracheal intubation is considered the most definitive tool for airway management, complications are often documented with it. And with other airway devices available, some experts question whether paramedics should even continue to intubate.
The goal of endotracheal intubation (ETI) is to place a tube in the patient’s trachea that provides an unobstructed pathway for ventilation.
If the tube is mistakenly placed in the esophagus and the error is not recognized, serious brain damage or death is likely.
Other airway devices are now available that can be placed in less time than an ET tube, require less skill to use and carry little risk of misplacement. Instead of a tube in the trachea, these devices isolate the trachea and ventilate through a port above the glottic opening. Known as supraglottic airway devices, they include the Combitube, laryngeal mask airway, SALT and King Airway. One drawback to the supraglottic devices is they may provide less protection from aspiration than an ET tube. Another is they will not ventilate effectively if the upper airway is obstructed.
The following steps provide a methodical approach to manage the airway of any intubation candidate.
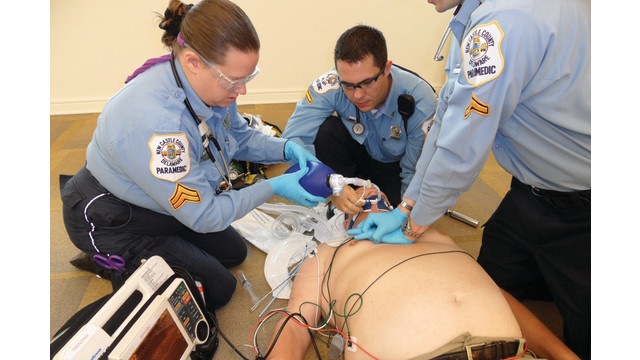
1. Practice
Paramedics are called upon to perform complex skills in adverse conditions—skills they may only practice a few times each year. This is why paramedics must practice airway management as often as possible.
- Determine if intubation is indicated
The use of basic adjuncts to manage a patient’s airway or placing a supraglottic device may be better than an ET tube for some patients. A successfully managed airway does not have to be intubated.
- Prepare the patient
Since paramedics only intubate in emergencies, there is often a sense of urgency and need to rush through the procedure.
Start with the basic airway adjuncts. Insert a nasal airway and oral airway if the patient will tolerate it. Preoxygenate the patient before an intubation attempt to increase their reserve capacity, but never hyperventilate a patient to do this. Hyperventilation is harmful for a number of reasons.
Suction every patient’s mouth with a rigid suction catheter. It will be much easier to visualize the airway landmarks if secretions are suctioned before the laryngoscope is introduced. This can be done during chest compressions, between ventilations with the BVM or with an oxygen mask in place.
To align the airway landmarks for better visualization, position the patient’s head so the ears are level with their sternum.
- Prepare equipment

Assemble all of your equipment, including backup devices, before attempting intubation
- Advance the laryngoscope blade
With the patient’s head in position, their mouth suctioned and your equipment ready, introduce the laryngoscope blade.
- BURP
Applying backward, upward, rightward pressure (known by the mnemonic BURP) to the lower third of the thyroid cartilage may help bring the airway landmarks into view. While your left hand holds the laryngoscope, place the middle finger of your right hand just below the thyroid cartilage. Gently pull it toward the patient’s right ear.
- Bougie
If you have sight of the epiglottis but a limited view of other airway landmarks, consider the bougie next. Also known as a flex-guide ET tube introducer, this is a curved-tip stylet that is easier to place than a larger-diameter ET tube. Place the upward tip behind the epiglottis and advance it.
- Abandon the attempt and reassess
An intubation attempt should be stopped if:
- Compressions must be interrupted on a patient in cardiac arrest
- A patient with a pulse desaturates or becomes bradycardic
- Airway landmarks are not located after the previous steps.
- Confirm placement
Even if the tube was visualized passing the landmarks, it must be proven.
- Secure the tube
Once tube placement is confirmed it must be secured with a commercial device or tape. Never rush this step and pay close attention to details.
Full article here.